Glenlochan -The Beginning

Glenlochan -The Beginning
Glenlochan - The Beginning

Glenlochan Today

Glenlochan Today
Glenlochan Today

Wednesday, August 28, 2013

Letting Go...of Perfection

This house has changed us - mentally and physically.  In the cerebral realm, for the good, I think.  We've slowly but surely come to the realization that, when it comes to renovating charming old homes, perfection is an unattainable goal.  Just this weekend, Rob, Mr. Perfectionist himself, admitted OUT LOUD that he's had to let go of that standard.  And, that's okay.  Because otherwise, we'd never be done...never, ever.   Letting go of perfection feels good, freeing, and allows us to see the light at the end of the tunnel.  Although Glenlochan will probably never be "done", we will have our COV (Certificate of Occupancy) sometime this fall.  It will happen.

In the physical realm, changes indeed, but definitely not as positive.  I have now joined Rob on the injured list.  Yup, he's been working through a partially torn rotator cuff and a bone spur for a few months now (both made somewhat manageable for a short while with cortisone) and I now have a blown out (up?) knee.  I'm currently elevated, iced, and braced,(the swelling is coming down and I can now bend it slightly!) but will be doing follow-up with the orthopedic to determine long term fixes.  In the short term, like Rob, I'll have to get back to work after I baby it through this episode. 

So, letting go of perfection was timely and, coincidentally, came just before this injury that will cost me valuable work time.  Despite the fact that I got precious little accomplished this weekend due to the injury, Rob's been an utter, non-perfect machine.  Here's a few photos of recent progress:

You may remember where we left off at the game room fireplace:
 This project is now done - here's the sequence:
 Wow - one can actually smile when perfection is out the window...
Like a giant jigsaw puzzle - the key is not to over think which stone goes where....!


The mantel still needs to be added - we are repurposing an old beam from the house as the mantel, but this is otherwise done.  The pictures don't really capture the dramatic effect of the stone against the wall.

And, in other news, the main upstairs bathroom tub and floor is now tiled and just awaiting grout and the addition of the beautiful tile baseboards - here's a few shots of the tub progress:


 I'm loving the vintage black and white look.  Here's the floor (I don't know how Rob laid this without going cross-eyed!). First tile going in:

Looking good:
Check out the black marble transition strip...
Pretty darn good - one might say, almost perfect, but, since we've let go of that standard, I'm loving it, imperfections and all.

Thursday, August 22, 2013

House of 1000+ Nail Holes

I'm currently flummoxed by nail holes.  Thousands upon thousands of them.  I don't have a rational explanation for why I didn't realize that when the interior trim was attached to the windows and doors the attachment process would leave nail holes....lots and lots of them.  I honestly never considered it.  The trim looks GREAT, and the edges are nicely painted and a neat white contrast against the walls:


But a close inspection shows all the nail holes on each and every piece of trim.  Miles and miles of trim, as you may recall.  Now, I have miles and miles of nail holes.


 The solution:

Professional painter's putty is my new best friend.  I have the enviable task of hours upon hours of filling nail holes:


There have been many worse jobs on this project - raking insulation in tyvek suits and masks comes to mind - so I will survive the tedium and at least I can do this task in relative comfort (air conditioning!).  After each nail hole is filled, the putty has to dry and then be sanded flat before painting can begin. Admit it, you are jealous that your upcoming weekends do not hold the promise of such fun!  If you are bored, feel free to join me in this fun at the house of 1000+ nail holes.

Wednesday, August 14, 2013

Me and My Machete (Reprise)

Almost 2 and a half years ago, I tackled the invasive bamboo stand on the property with a machete and after a full day of work, realized that a machete was not going to solve the bamboo issue:  Me and My Machete (Original).  In the interim, we've tackled many more important tasks, all structure related, and knew in the back of our minds that the bamboo, landscaping and, frankly, the entire outside yard and dock would be much later phases of the project.  However, we recently had our excavator (and also supplier of the much-used port-o-potty) out to replace the home's sewer line from the house to the street and, in the process, discovered that he was willing to dig out the bamboo at a relatively good price.  Using MACHINERY, not machetes.  Meaning, it would be done not only in this century, but in a mere day or two.  Wow, we'd be stupid NOT TO.  So we did.

Here's the starting point:

 The first piece of MACHINERY (the CAT) in action:
It sliced through the bamboo cleanly - much better than the machete and much more quickly!


Phase 2 - digging out the roots with the second piece of fine machinery:


Not shown, the third piece of machinery  - the dump truck that hauled all of this away:

I definitely have machine envy - anyone want a slightly used machete??
The small amount of remaining bamboo is actually on the neighbor's lot - they plan to remove it also, but in the meantime, we'll be religious about keeping it gone from our side.  Then, if they don't actually follow through soon to have theirs removed, plan B will involve a 3 foot trench, lots of concrete, and a large wall to keep it from re-invading us.  Bamboo free is a great way to be...but we realize it will be a multi year project to keep it that way.

For large scale bamboo removal, machinery definitely triumphs over machetes - hands down.

Sunday, August 11, 2013

The Ever-Lovin' Punch List

Our punch list reproduces like rabbit and stray cats, growing to the tune of two steps forward, one step back.  We are tempted to shut down the project and not let anyone else in to do work, for fear that they will UNDO previously finished work in some way. I really should fess up that our punch list is largely theoretical at this point.  We keep adding items to it, so we know it's long and unwieldy, but we haven't actually committed pen to paper.  Much like the noise a tree makes when it falls in the woods, the punch list exists in excruciating detail despite the lack of physical form.

Looking at a final room-by-room To-Do list at this point would just be depressing and overwhelming and would likely freeze our progress in our tracks.  A few examples of how this list reproduces itself:

Walls painted, check
Stairway banister stripped, check
Item for punch list:  touch up all the stripping splatters on the hallway wall

Walls painted, check
Downstairs hardwood floors installed, check
Item for punch list:  repair all the drywall dings in the walls and ceilings from the floor installation
Additional item for the punch list: touch up all the paint on all of the repairs

You get the idea.

It's a natural fact of renovation and having so many different and talented people working on our house that dings, spatters, chips, cracks, and spills will occur.   We get it, we really do, but when we've completed a project to perfection (since that IS Rob's standard for EVERYTHING, perfection) and it gets damaged or slightly undone as other work is being done, it still adds to our angst...and our punchlist. 

Despite the growing punch list that I refuse to give physical form, we have made progress - the study is really coming together.  It will be the only room with stained woodwork and coffers in the ceilings and we are awaiting the arrival of the specially ordered metal ceiling:

The below window will be where the original larger stained glass window (saved from the house, repaired, and carefully stored until it is time to install) will be mounted:

Built-in bookshelves will be added to both of these insets next to the fireplace.

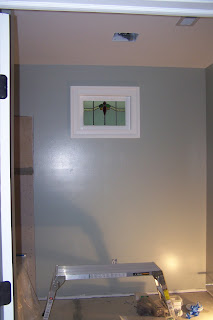
Progress was also made in the upstairs main bath - Rob installed the smaller original stained glass window.

 
Here it is painted and complete - we can take this item off the list!


And a quick hello from Tosha, official renovation dog:

She's exhausted, too!
All three of us look forward to triumphing over the ever-lovin' punch list!


Saturday, August 3, 2013

The Most Important Room in The House

One critical fact I've always known but recently have examined more closely and held close is that home truly is where my family is.  No matter how big or small the home, if it's filled with the people you love (even if they are just there temporarily, on a break from their hectic, busy lives), it's...give a big contented sigh here....home.  I'm a complete homebody at heart and I truly value the time I get to spend at home.  Although I prefer bigger spaces, I can be perfectly happy in a mobile home (we started our marriage in one and we've certainly logged a lot of time in the camper in the past 18 months) or our small Philly place.  But, I like to feel like I've earned a house - through hard work or sweat equity - and that's been largely true of every home we've owned.  Glenlochan is probably the king of our sweat equity projects to date and I'm really feeling like we've earned our stripes with this one.  Although I value my bedroom for being a peaceful oasis, and the living room for the hours of tv and other entertainment, make no mistake, the kitchen is, bar none, the most important room in the house.

The kitchen in Glenlochan is no exception.  Although it will give a nod to simpler times and homey, vintage materials, it will also have sleek stainless appliances, tons and tons of heavenly storage for my many gadgets and my too large accumulation of glassware and dishes and bowls, and most importantly, lots of room for people to gather.  Around the counters or sitting at the peninsula to eat or drink, in the kitchen workspace to cook, or the adjoining dining or keeping rooms to visit, there will be many places to congregate.  One rule of thumb we learned from all of the other houses we've owned is that, no matter how nice and appealing the other rooms are in the house, everyone will gather in the kitchen without fail.  A kitchen manages to pull people in, encourage them to stay, no matter how small and cramped it may be in there, and exude an almost magnetic attraction.   So, in this house, there will be room to gather in the chaos of the heart of the house, the kitchen.

And, that brings us to the counter top installation.  After multiple setbacks getting to this point, including the keen disappointment over not getting the original soapstone slabs we selected, the soapstone counters are in, and all the issues we faced in getting to this point have slipped fuzzily to the edges of my memory in favor of the wondrous beauty of these natural counters, now the focal point of the most important room in the house.  I cannot help but pause every time I am in the house to run my hands over the counters, to stare at the unique veining - seeing different patterns each time - to wet an area to see what it will look like once it's oiled (that will be a while yet), and to imagine all the future kitchen gatherings that will take place around these counters.  The installation process was smooth sailing - the installers did an excellent job with these very heavy slabs, cutting them to a precision fit in all cases, sliding them in without damage or mishap, making the seams practically invisible.

Forget diamonds, designer purses, shoes and clothes, and new cars and give me soapstone counters instead any day of the week.  Well worth the wait and the budget splurge, these subtle yet distinctive counters promise years of enjoyment and practicality while we prepare food and fun for all of the people we love most. 

On to the visuals, starting with installation day.


Yes, the right slabs arrived this time - the block/slab numbers were triple-checked!

Carefully getting the slabs in after cutting them in the front yard.
Partially installed:


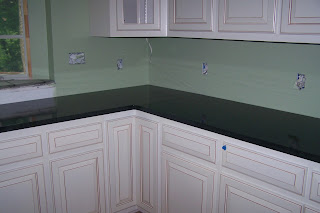
And, the full finished product (the counters were wet with a sponge in the last few shots below to illustrate the rich black color these counters will have once they are oiled; until then they will be a natural grey):


Without a doubt, this is the most important room in the house.