Back in the cold weeks of winter when there wasn't nearly as much to do on the project or otherwise, I decided to plan ahead a bit. I knew that there were some heavy duty wood stripping projects in my future on the project plan for Glenlochan, and it had been a number of years since I'd tackled stripping anything. Additionally, my lifetime portfolio of refinishing projects was pretty sparse. As such, I decided that a little research and a little practice was in order. So, on a wintry weekend, I visited one of my favorite Philly thrift shops, on the hunt for something small that I could strip and refinish to hone my skills a bit before starting the items in Glenlochan. I lucked into finding this cute little bedside table - a little negotiation and 24 bucks later, it was mine.

I loved it - but it was definitely worn and scratched, well-loved, and cute as a button - it was the perfect testing ground for my nascent stripping skills. I worked on this for several hours over two weekends and made huge progress. After trying a variety of products, methods (we've tried everything but a heat gun) tools and tricks, I managed to get it mostly stripped in the tiny basement of our Philly house (with the door open in the middle of winter to let the fumes escape) and then I moved on to power tools - the palm sander Rob had purchased a while ago beckoned to me. With Rob safely gone so I could experiment in private, I moved to the front porch (only place with an outside outlet) and proceeded to learn the ins and outs of the palm sander. Wow - that was the ticket - my new favorite power tool. Rob was suitably impressed when he came home and saw my progress:


The wood is beautiful, but before I could finish this side practice project, the house and other things needed attention, so I turned my efforts towards the first of three vintage mantels we salvaged from Glenlochan prior to the demolition phase. This was the biggest and most ornate of the three mantels, and my hope was (and still is) to get it stripped thoroughly enough that we can actually stain and finish it, rather than paint it. Here's where I started:
Unlike my thrift store find, this baby was covered in a good 2 coats of paint over the original stain and varnish, so it has required a lot more effort. I dove into this project over the course of two days spent in VA and made some good progress - the pictures below illustrate the progression:
The mantel right now:
It's a beast of a job, but hopefully it will be worth it. The amount of time and muscle and patience it takes to strip something like this made me very concerned when, just prior to last weekend, Rob announced that we had to get the stairway banister and posts stripped by....THE END OF THE WEEKEND. Holy crap, Batman. He insisted that it had to be done prior to the floors getting laid because of the mess made when stripping. He was absolutely right, and I expressed all the confidence in the world that we could get it done (although the two unfinished stripping projects described above were weighing heavily on my mind and I had severe doubts that I'd ever finish a stripping project).
Like the mantel, the upstairs banister had been heavily coated in layers of paint, some really ugly black stain and varnish. With my practice on the end table and the mantel, I had learned that I had a strong preference for Strypeeze chemical stripper over any of the others I had tried. Unfortunately, Lowes stopped carrying Strypeeze sometime after I bought it a few months ago, so I had to resort to an online purchase. A huge price break was given for buying four gallons - I would have been stupid not to!
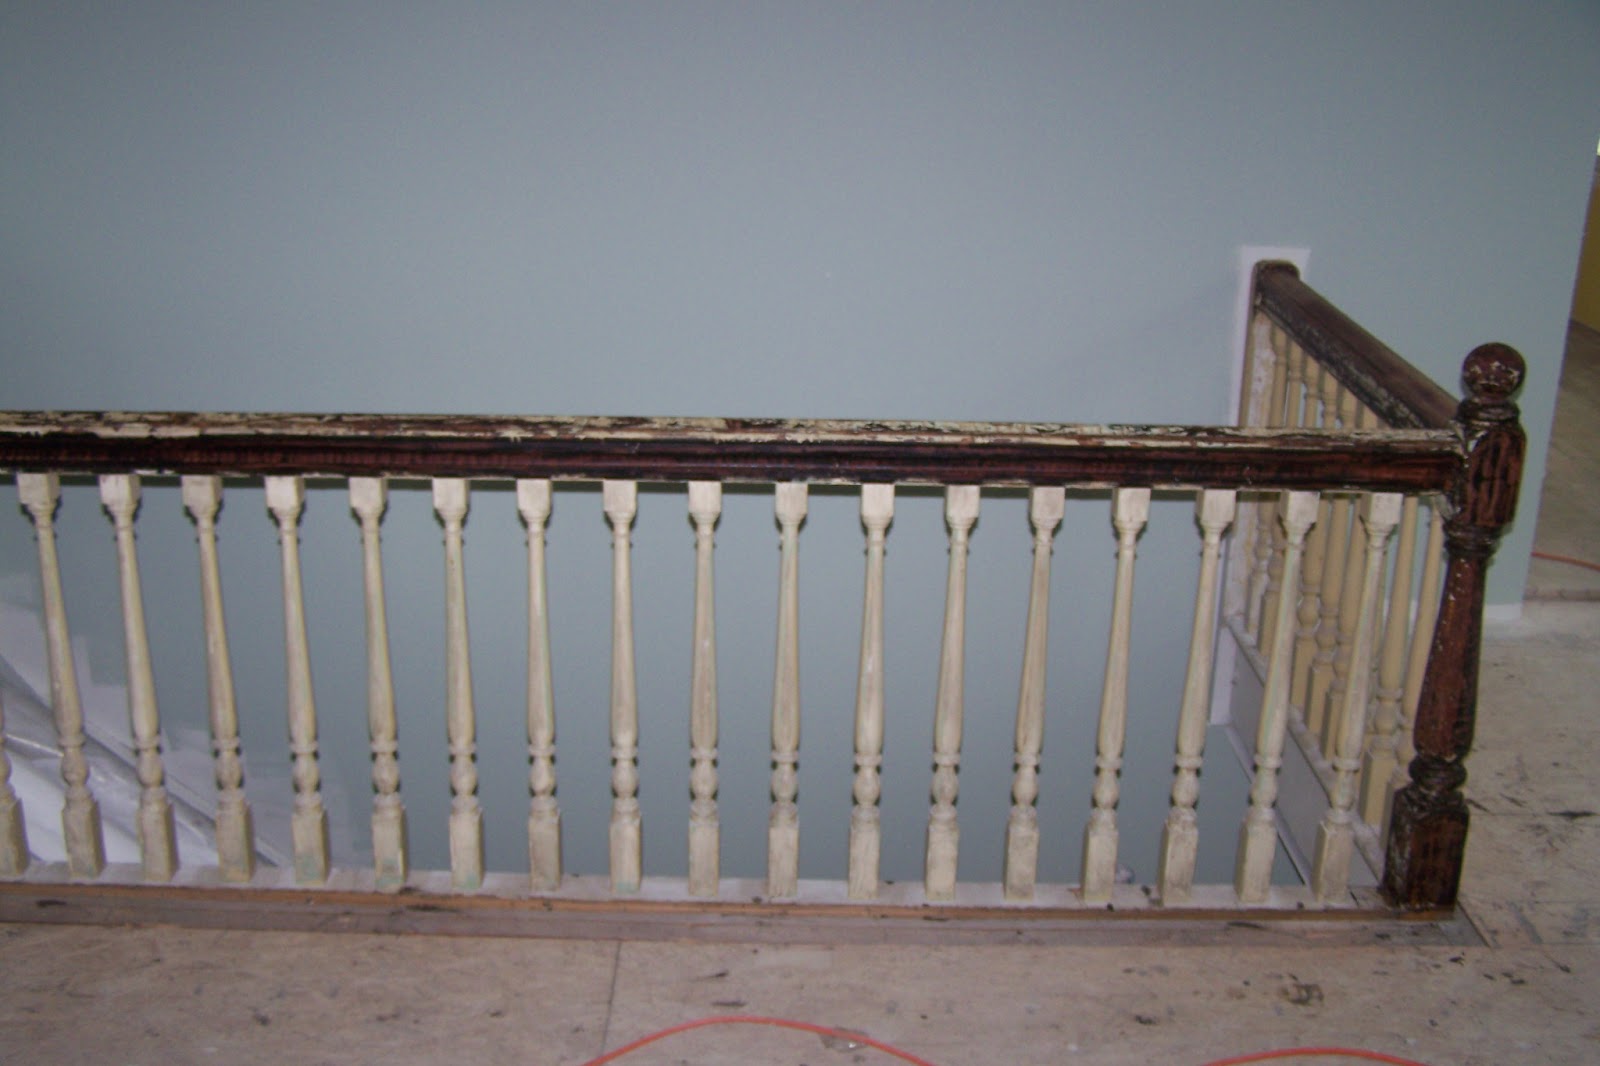
Here's was the starting point for us on the bannister:
We were planning to keep the spindles painted since that was how they were originally - they had never been stained - but the downstairs handrail and newel post had never been painted and they were beautiful heart of pine.
At some point, probably when the upstairs of Glenlochan had been converted to a separate apartment, the upstairs banister had been stained black, and then later, painted once or twice. It promised to be a challenging job. Fortunately, before I arrived for the weekend, Rob gave us a headstart:
Although it looks like it was mostly done, it actually wasn't, and I jumped in and started on it early Saturday morning. Together we both worked on the bannister for most of Saturday and Sunday to get it done before the vintage heart of pine floors were to be installed on Monday. Rob had set up a nifty scaffold over the stairs that allowed us to work on both sides of the rails comfortably.

We were stripping machines:
By Sunday night, we had both bannisters looking almost the same. A little bit of finish sanding will still be necessary, but the end result was pretty amazing and we are so excited that the bannisters are going to look so matched and terrific when finished and sealed. Here are the two bannisters (never painted and newly stripped) side by side:
While driving back to Philly at 4:00 am Monday morning, I was totally psyched about our ability to restore the mantels and ultimately, to finish my practice project. I don't plan to do either on such an intense deadline, however.


 We were stripping machines:


